

本文最后更新于 2025-11-27,文章内容可能已经过时。

免责声明(复制于原项目)

本研究内容仅面向学术研究与技术交流,旨在探讨商业软件注册限制的技术实现方式。image-BvQB.webp
特别声明:

  • 本文仅用于学习和研究目的,不得用于任何违法违规、侵权或商业用途。

  • 文中所涉及的方法与技术,不代表作者对任何绕过行为的鼓励或支持。

  • 用户在操作前,应确保已获得软件供应商授权,并遵守所在地区的法律法规。

  • 本文不对任何因使用本文内容所产生的法律风险、经济损失或其他后果负责。

  • 请使用者在合法前提下进行相关实验,并对自己的行为负责。


注册流程分析

本文仅作技术分享,不提供技术交流,不讨论用途。

先说结论:MailPlus-Server 的许可证验证链路整体较为严密,核心流程包括:

  • synopki_init

  • synopki_activated

  • synopki_encrypt

  • synopki_decrypt

  • synopki_set_pk_signature

  • synopki_verify_sign_key

  • synopki_verify_sig_by_ed25519_pk

  • Z85_encode

  • Z85_decode


信任链结构

MailPlus 授权验证基于官方硬编码公钥,通过层层校验完成授权控制:

  1. 硬编码 Synology 公钥

  2. 验证签名文件(路径:/usr/syno/etc/license/private/Sing.9

  3. 验证 Vault 中的对等公钥

  4. 用于加密 / 解密与签名校验


演示环境

  • 主机:黑群晖(非官方机型)

  • NAS 型号:SA6400

  • DSM 版本:DSM 7.2.2-72806 Update 4


破解教程

群晖 MailPlus-Server 默认仅支持 5 个免费用户。如需创建更多账户,需要借助本文所展示的技术研究方法。
核心操作非常简单,只需运行一条脚本命令。为保证兼容性,请先安装最新版 MailPlus-Server 套件。

1. 安装最新 MailPlus-Server 套件

套件中心显示的版本可能不是最新,因此建议进入群晖官方下载中心检查更新:

下载地址:
https://archive.synology.com/download/Package/MailPlus-Server

若存在更新版本,下载后在“套件中心 → 手动安装”中导入。
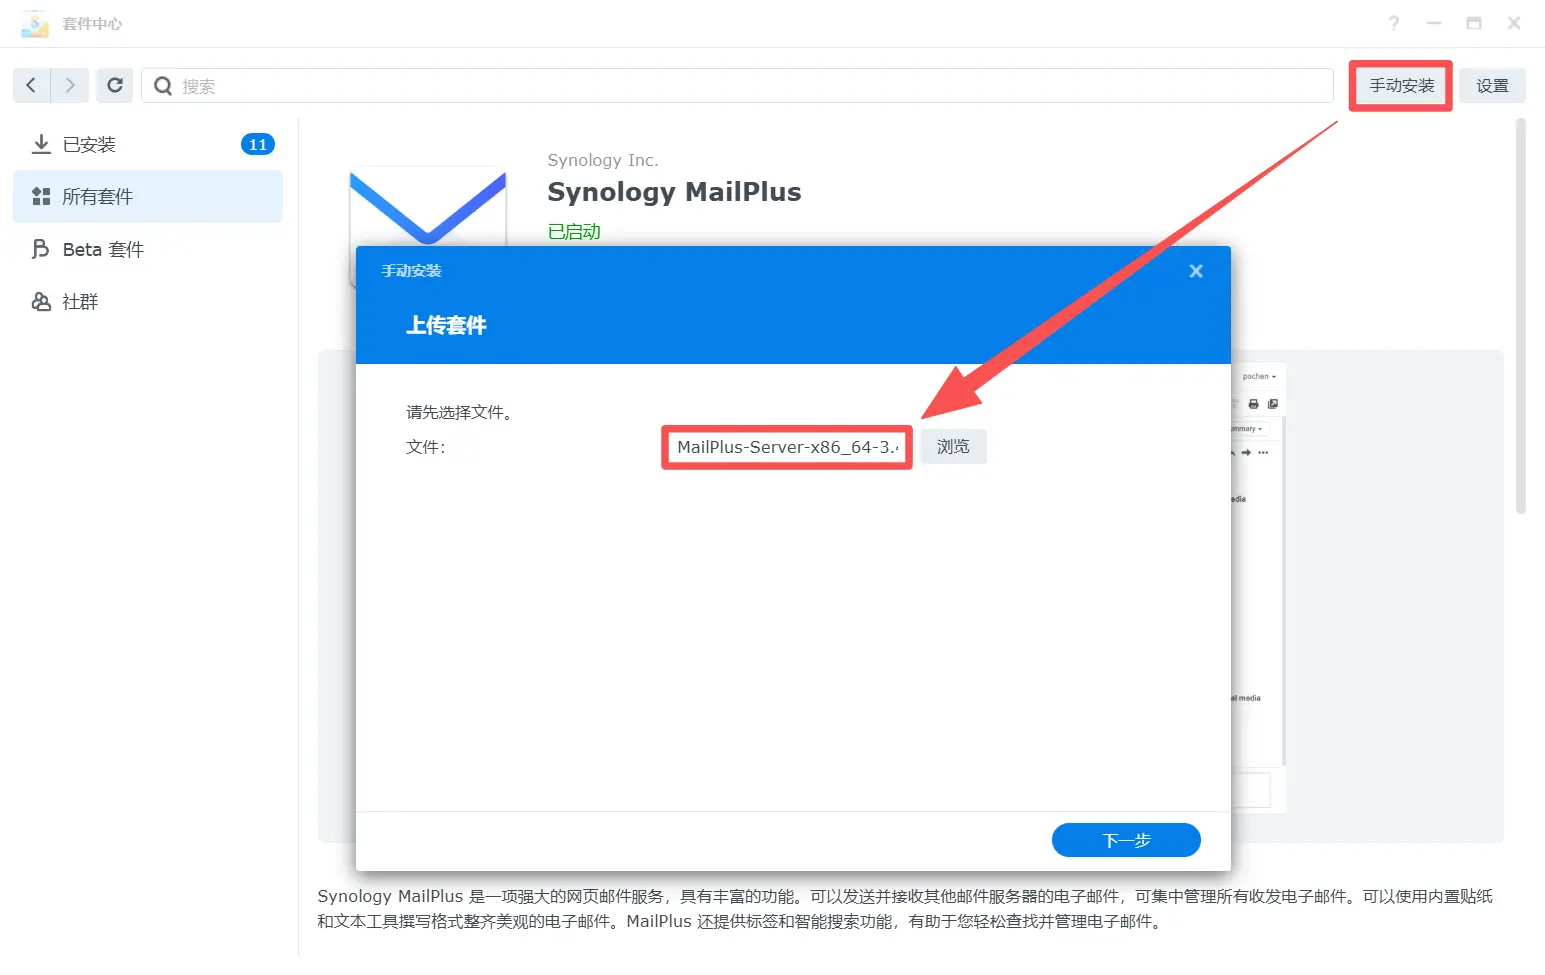
安装完成后启动 MailPlus-Server 套件。


2. 启用 SSH

进入群晖NAS:

控制面板 → 终端机和 SNMP → 终端机 → 启用 SSH 功能 → 应用DSM open SSH.png
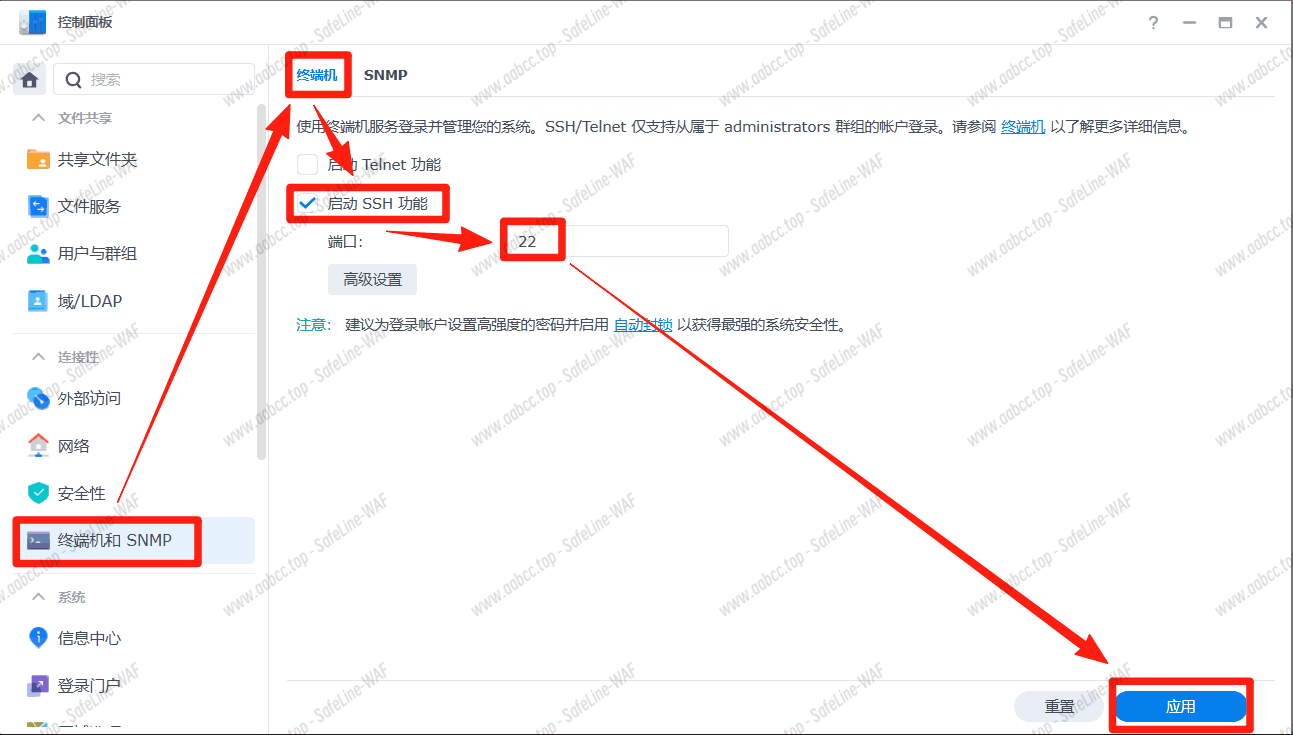
然后使用终端 SSH 登录 NAS,并切换为 root 权限。


3. 执行破解命令:在线版本(推荐)

默认使用普通方式:

curl -fsSL https://raw.githubusercontent.com/ohyeah521/MailPlus-Server/main/activated.sh | bash

使用 GitHub 代理(可自定义代理地址,注意末尾 /

export GPROXY=https://gh-proxy.com/
curl -fsSL ${GPROXY}https://raw.githubusercontent.com/ohyeah521/MailPlus-Server/main/activated.sh | bash
export GPROXY=

使用 http(s) 或 socks5 代理(请自行替换代理地址)

export CPROXY=http://username:password@192.168.20.1:7890
curl -fsSL -x ${CPROXY:+-x ${CPROXY}} https://raw.githubusercontent.com/ohyeah521/MailPlus-Server/main/activated.sh | bash
export CPROXY=

4. 离线执行破解脚本(本地运行)

# 1. Download https://github.com/ohyeah521/MailPlus-Server/archive/refs/heads/main.zip
# 2. Unload to your DSM system.
unzip MailPlus-Server-main.zip
cd MailPlus-Server-main
chmod +x activated.sh
./activated.sh 

5. 执行记录示例(供参考)

以下为一次真实的执行记录,用于判断你的执行过程是否一致:

S20306@test:/$ sudo -i
Password:
root@test:~# cd /volume1/Download
root@test:/volume1/Download# curl -fsSL https://raw.githubusercontent.com/ohyeah521/MailPlus-Server/main/activated.sh | bash
Info: Found MailPlus-Server-x86_64-3.4.1-21569
Info: libmailserver-license.so.1.0 downloaded successfully.
{"action":"stop","beta":false,"error":{"code":0},"finished":true,"language":"enu","last_stage":"stopped","package":"MailPlus-Server","pid":14832,"scripts":[{"code":0,"message":"","type":"stop"},{"code":0,"message":"","type":"stop"}],"stage":"stopped","status":"stop","status_code":324,"status_description":"translate from systemd status","success":true,"username":"","version":"3.4.1-21569"}
Info: Add block license server: license.synology.com
0.0.0.0 license.synology.com
Info: libmailserver-license.so.1.0 processing ...
{"action":"start","beta":false,"error":{"code":0},"finished":true,"language":"enu","last_stage":"started","package":"MailPlus-Server","pid":17182,"scripts":[{"code":0,"message":"","type":"start"}],"stage":"started","status":"running","success":true,"username":"","version":"3.4.1-21569"}
root@test:/volume1/Download#

执行结束后,进入群晖套件中心重新启动 Synology MailPlus-Server 套件应用即可。


6. 查看破解结果

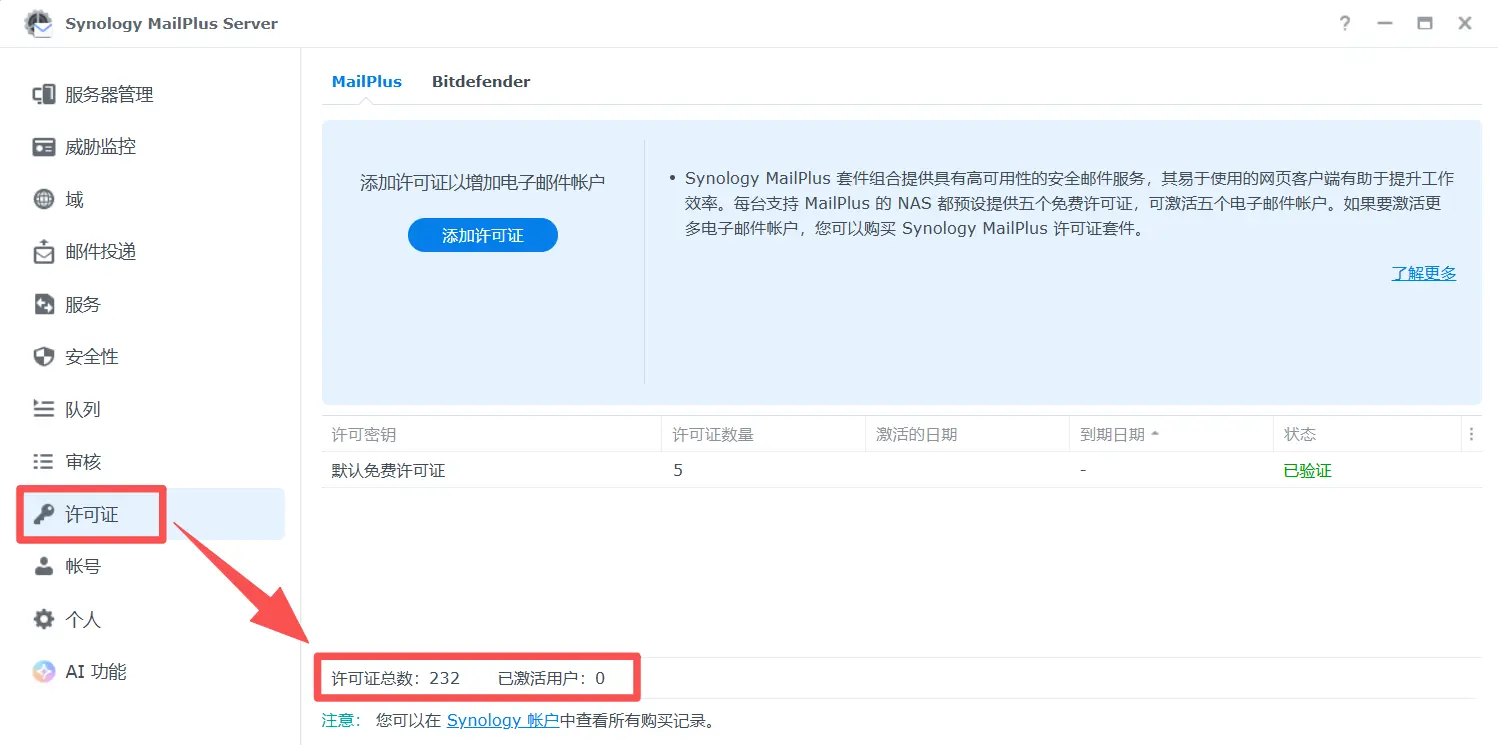
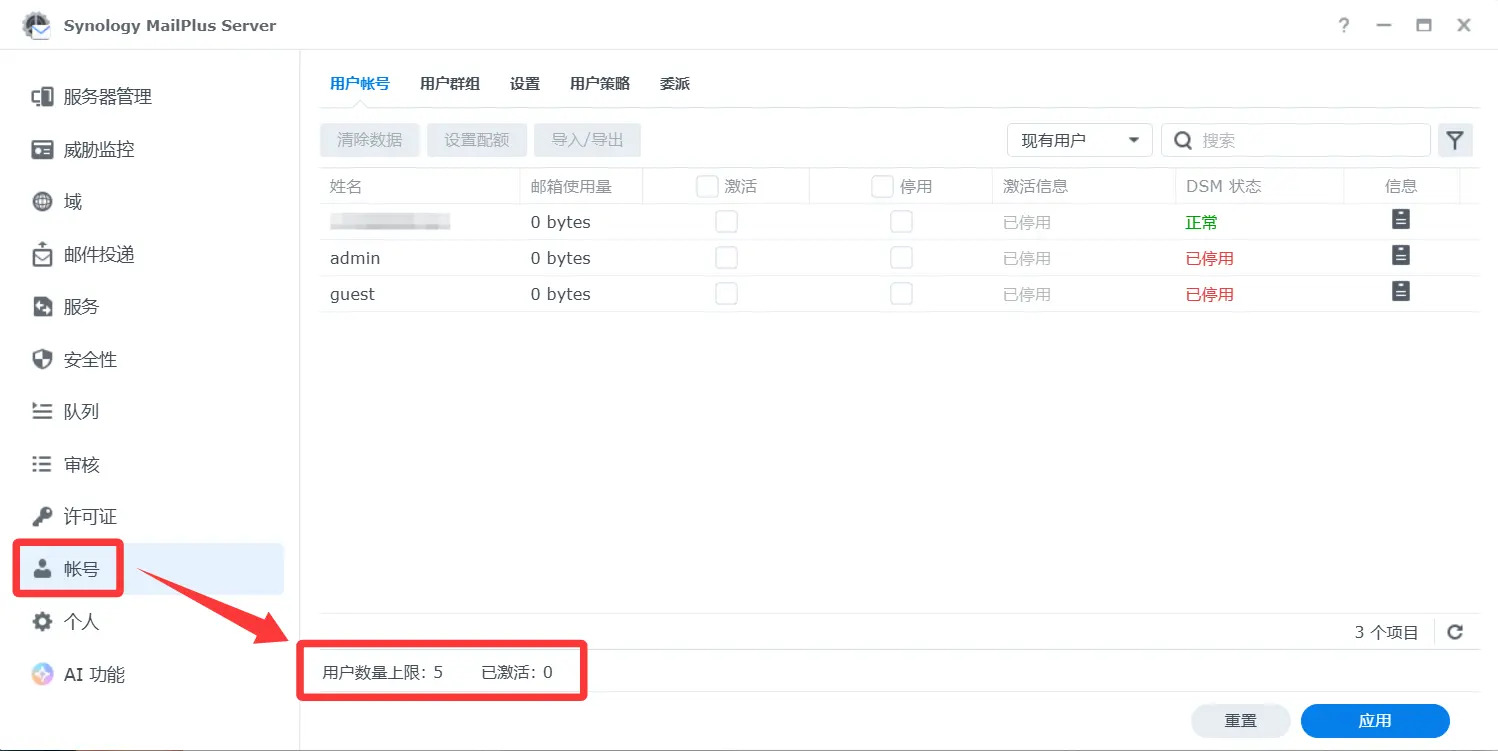
刷新一次群晖NAS页面,打开 Synology MailPlus-Server → 账户,即可看到用户数量上限已经提升至约 232 个

不同型号和版本可能显示 232/234 不等(以下为项目作者提供的截图示例)。

打开许可证页面,也可以看到许可证总数也是达到了一样的数量。


恢复原始授权限制

如果你需要恢复原始状态,只需运行脚本的恢复模式(-r 参数)。

在线恢复方式(推荐)

# 普通
curl -fsSL https://raw.githubusercontent.com/ohyeah521/MailPlus-Server/main/activated.sh | bash -s -- -r

# GitHub 代理
export GPROXY=https://gh-proxy.com/
curl -fsSL ${GPROXY}https://raw.githubusercontent.com/ohyeah521/MailPlus-Server/main/activated.sh | bash -s -- -r
export GPROXY=

# http(s)/socks5 代理
export CPROXY=http://username:password@192.168.20.1:7890
curl -fsSL ${CPROXY:+-x ${CPROXY}} https://raw.githubusercontent.com/ohyeah521/MailPlus-Server/main/activated.sh | bash -s -- -r
export CPROXY=

离线恢复脚本

# 1. Download https://github.com/ohyeah521/MailPlus-Server/archive/refs/heads/main.zip
# 2. Unload to your DSM system.
unzip MailPlus-Server-main.zip
cd MailPlus-Server-main
chmod +x activated.sh
./activated.sh -r

相关资源

文末

👇👇👇